
Introduction:
Use Case Example:
Given a character with a blend shape based facial rig, rather than set your driven keys one by one, you can simply select the head and run the script which will set-driven-keys to attributes, named after their source target, on a locator in just a few seconds.
What does it do?
The script will create or populate a controller with attributes named based on the chosen blendShapes and then use Set-Driven-Keys to connect the activation of those blendShapes to the value of the attribute on your control.
- The tool supports the use of both In-Between targets and Combination Targets.
See it in action with this video demo:
Features:
Filtering:
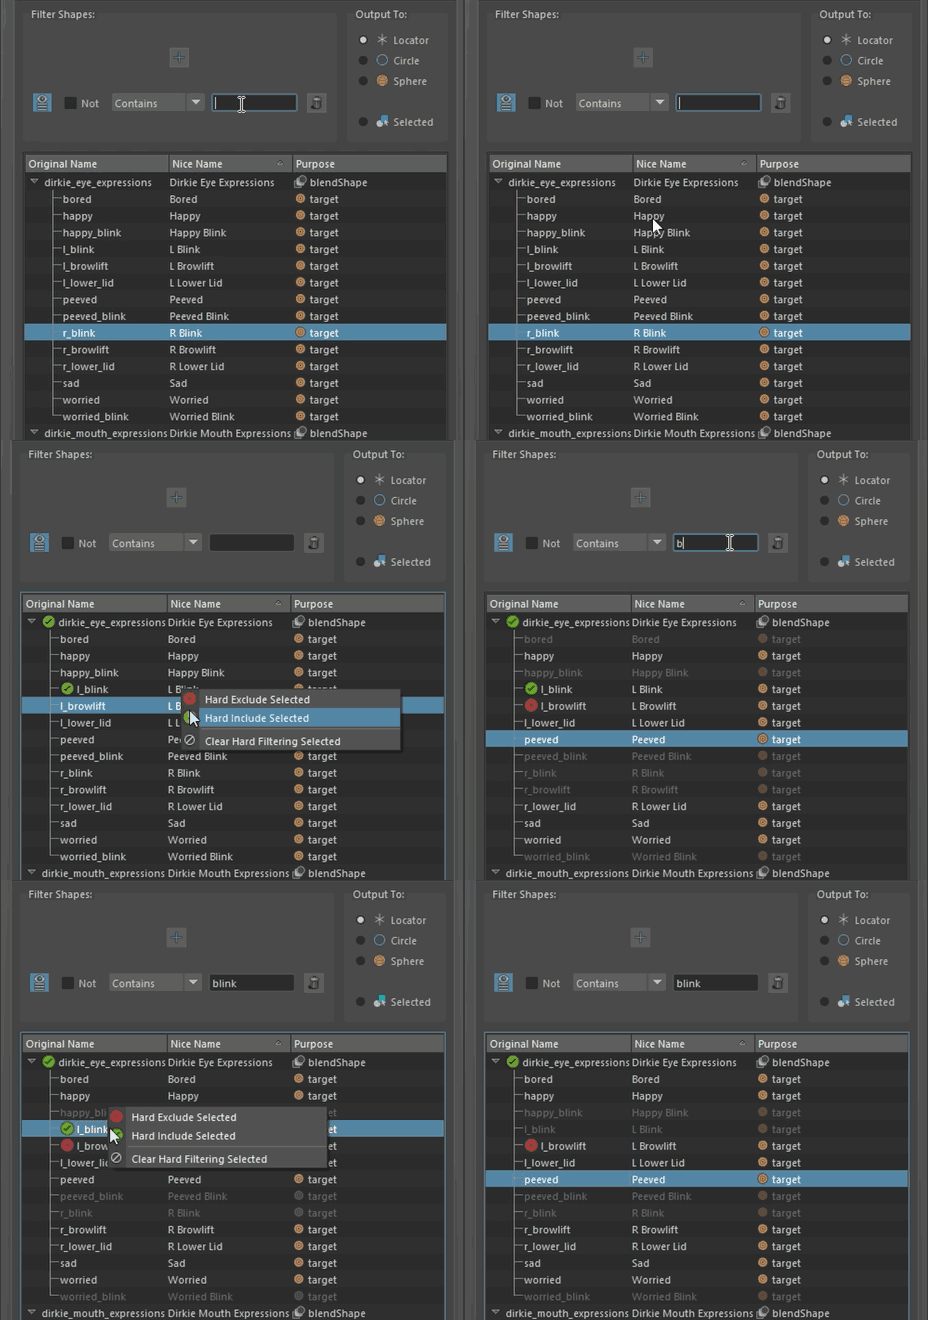
Dynamically add an array of simultaneously additive filters.
- Use the Eye icon to ignore the effect of any particular filter.
- Use the "Not" checkbox to invert the result of the filter.
- Choose where to check for the user-input string among the options, [Contains, Starts With, or Ends With]
- Click the Bin icon at the end of the row to remove that filter.


Hard Include/Exclude:
To assist in more specific filtering, you can force individual items to be included or excluded from being added to the control regardless of their relationship to the filtering done above. Do this by accessing the option menu for an item by right clicking it.
Variable Output Target:

You can output the attributes that will be used to control the blendShapes to different targets.
If you select Locator, Circle, or Sphere, an object of that type will be created and named for you before having the attributes SDK'ed to it.
If you selected more than just your mesh with the blendShapes initially, you will find that the items in that selection become available as output targets.
How to Use:
Select the mesh you want to map blend shapes for, and optionally also the control where you want to put the control attributes.
Run the script.
Filter which blend shapes should go through if you wish.
Choose what you want to export the attributes to.
Click "Execute" and watch it run.
Installation Instructions:
Open the .py file in any text or script editor.
Paste the entire contents of the .py file into the Maya Script Editor.
Save the script as a button to your shelf.